Sunday, November 30, 2014

Baby It's Cold Outside-Baby Shower for Kendall


This week we gathered together to celebrate sweet baby Kendall's arrival with a "Baby It's Cold Outside" baby shower.


Lots of yummy appetizers and sweet somethings were served.


And I promise to share some of these fabulous recipes in an upcoming blog post.  


Katherine created the beautiful cupcakes.


The Cocoa bar was a warm addition.


Wonderful, generous friends and family brought beautiful gifts of love.


While at the shower we created a little book of 
"Mommy-Baby Advice" and sent it home with Kendall and her mom.  It was the closest thing we could get to a New Baby Girl How-to-Manual.  Some great advice, even for an "experienced" mom like me!


OH BABY!  A "Sweet Somethings" thank you for coming.


Congratulations to Bianca and our sweet baby Kendall.


Saturday, November 29, 2014

Homemade Christmas Gift Ideas

My kids school has a little holiday boutique for the kids every year that is really special. Parents donate items for the boutique and then on each class' designated day the kids bring a few dollars in and "shop" for their families. All the money that is received is donated to families at our school that are in need. It's a really great way to give back to our school community as well as fun for the kids to shop for their family members. They even wrap the gifts in class so everyone can be surprised. One of my favorite gifts that one of my kids got for his grandpa were these "tootsie roll socks" it was great and he was so proud when grandpa put them on!
This year our school asked us to be creative and do some homemade gifts instead of just hitting up the dollar store.  I decided to take on the challenge. My kids and I made 3 types of gifts to donate.
The first are these cute mustache hot chocolate mugs. I got a mug from the dollar store, cut out a vinyl mustache on my silhouette, and put a little baggie of hot chocolate, mini marshmallows and candy canes. I tied it all together with this cute "Staching through the snow" tag. I love how it turned out.
The second item we made were these cute little scrapbooked journals. My 12 year old daughter did these pretty much all by herself. I got the idea from one of my favorite blogs, Lil Luna. She has all the dimensions and directions laid out for you.
The third idea was from this website. These cute dinosaur handle cups. They were super simple. I bought the cups and the dinosaurs from the dollar store and glued them on with E6000. You do need to hold them in place while the glue sets but once it's on, it's nice and strong. I decided to make it more of a gift by putting bottled water with a little fruit punch packet tied on.
I really enjoyed making these crafts this year. I tried to make as many of each as I could. Hopefully this will be a new tradition that I can share with my kids so they can feel a part of giving every Christmas season.
 
Here is my "staching through the snow tag" if you would like to print one for yourself! Just click on the image and save.


Monday, November 24, 2014

Ham and Cheese Sliders-MMMmmm Monday


I haven't eaten something this extraordinary in a long time! 

 Our PTA has some of the greatest ladies I know serving on our Executive Board.  One of these ladies has been serving as our SEOP Dinner Chair for almost ten years.  She makes the greatest food!  Just recently she served these ham and cheese sliders (along with equally delicious side dishes) to our teachers right before they conducted their parent/teacher conferences.

Dianne said the sliders are super easy to make and always get rave reviews.  Our teachers came back for seconds and thirds, until everything was gone.

Ham and Cheese Sliders
Ingredients
24 white dinner rolls
24 pieces honey ham
24 small slices Swiss cheese
2/3 cup mayonnaise
2 TB Dijon mustard

Poppy seed sauce:
1 Tablespoon poppy seeds
1/2 cup butter, melted
1 Tablespoon minced onion
1/2 teaspoon Worcestershire sauce

Instructions
In a small bowl, mix together mayonnaise and mustard. Spread onto both sides of the center of each roll. Place a slice of ham and a slice of Swiss inside of each roll. Close rolls and place them into a large baking dish or heavy cookie sheet. Place very close together.

In a medium bowl, whisk together all of the poppy seed sauce ingredients. Pour evenly over all of the sandwiches. You do not have to use all of the sauce! Just use enough to cover the tops. Let sit 10 minutes or until butter sets slightly. Cover with foil and bake at 350 degrees for 12-15 minutes or until cheese is melted. Uncover and cook for 2 additional minutes or until tops are slightly brown and crispy. Serve warm. Note: Sandwiches can be assembled a day ahead and kept in the fridge ready to bake.


 photo Kelliesign.jpg

Monday, November 17, 2014

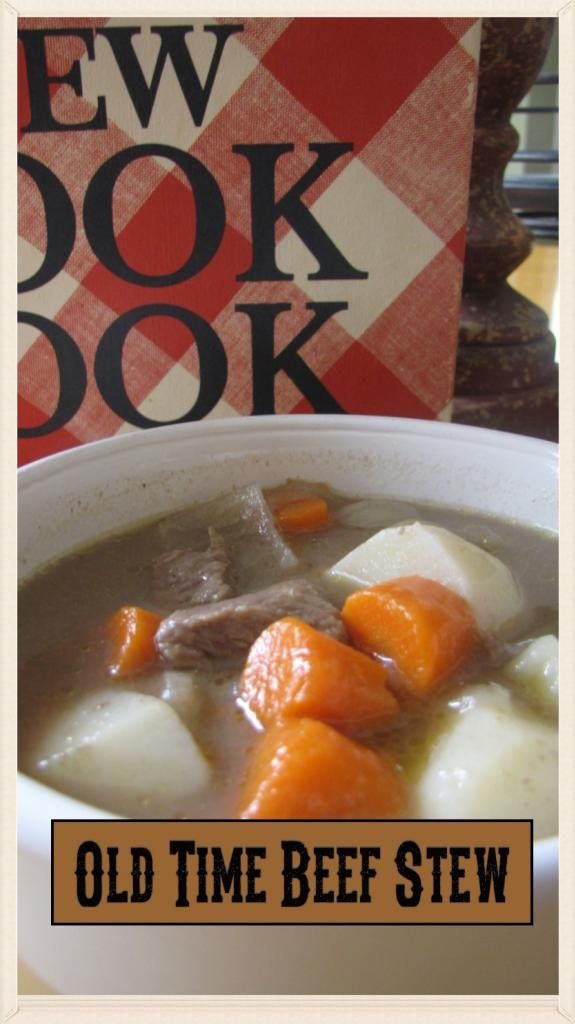
Old Time Hearty Beef Stew-MMMmmm Monday

 photo 94cc4f87-884b-48b3-b48e-931fdcc01df7_zpsfa9f2a3e.jpg

When the weather turns cold don't you just crave some of your favorite comfort foods?  This week it started to look like winter outside and it definitely felt like winter inside.  I pulled on a sweater and sat down with a bunch of my  favorite cookbooks.  The Better Homes and Gardens is one of my favorites from many years ago...it might have even been my mom's cookbook!
  

I was looking for a soup or stew recipe that reminded me of Mom's.  I found it!  This recipe has an ingredient that most stews do not...cloves (or Allspice)!  It is exactly what a fall recipe needs, and exactly what I was looking for.


Along with the stew, I baked up some biscuits and steamed cups of hot cocoa.  Dinner that night felt warm and cozy inside and out!


Old-Time Hearty Beef Stew
(Better Homes and Gardens NEW Cook Book)

2 pounds beef stew meat, cut in 1 ½ inch cubes
2 tablespoons shortening (I used cooking oil)
1 teaspoon Worcestershire sauce
1 clove garlic
1 medium onion, sliced
1 or 2 bay leaves
1 tablespoon salt
1 teaspoon sugar
½ teaspoon paprika
¼ teaspoon pepper
Dash ground allspice or cloves
6 carrots, pared and quartered
4 potatoes, pared and quartered
1 pound small white onions
3 tablespoons all-purpose flour

In Dutch oven, thoroughly brown meat in 2 tbsp. hot shortening, turning often.  Add 2 cups hot water and next 9 ingredients.   Cover; simmer for 1 ½ hours, stirring occasionally to keep from sticking.  Remove bay leaves and garlic.  Add vegetables.  Cover and cook 30 to 45 minutes, or till vegetables are tender.
Slowly blend 1/3 cup cold water into 3 tablespoons flour.  Stir slowly into hot stew mixture.  Cook and still till bubbly.  Cook and stir 3 minutes longer.  Serve stew in bowls.  Makes 6 to 8 servings.

(I thought I might trying adding kale or spinach leaves next time-just for a little added yumminess!)

 photo Kelliesign.jpg


Sunday, November 16, 2014

Thanks & Giving Activity (Turkey Toss)


Thanks & Giving Activity (Turkey Toss)
Primary Singing Time

I have been serving as the Chorister in our congregation's Primary, an organization like Sunday School, for children.  Today we learned a bit about how important it is to be mindful of our blessings and to remember to be thankful for them.

I explained to the children that I brought some fine feathered friends with me to help each of us with our THANKS and GIVING singing activity and then asked them to think about these two questions:

1.      What blessings has Heavenly Father given me?
(Almost every child raised their hand to share a blessing they had been given from Heavenly Father)
2.    How can I show my thanks to Him?

·        Toss the bean bag and see which turkey you throw closest to. 
·        Read one of the blessings on the back feathers.
·        How do I show thanks to Heavenly Father for…
·        Sing the corresponding song.        

Blessings
Heavenly Father -I Need My Heavenly Father-pg. 18 CSB          
The Savior-I Have Two Little Hands-pg. 272 CSB                 
Scriptures-Scripture Power-sheet music                  
Prayer-A Child’s Prayer-pg. 12 CSB
Our Prophet-Follow the Prophet-pg. 110 CSB        
Temples-I Love to see the Temple-pg. 95 CSB
Families-Families Can Be Together-pg. 188 CSB   


The "Rafter of Turkeys" instruction came from Primarily Singing
and I have to express my thanks for making it so easy to re-create these adorable turkeys.  I love it when I see a picture of what I want and then when I create it, it looks pretty much the same!

The children enjoyed trying to "tag" the turkey with a little hacky sack (bean bag).


 photo Kelliesign.jpg